How to Make an Event Photo Frame and Share on Social Media
In today’s digital era, event photo frames have become a fantastic way to boost event engagement and branding. Whether you’re organizing a wedding, a corporate event, a birthday party, or a community gathering, adding custom frames to attendees’ photos makes memories more special and shareable. Platforms like FrameMe.org make creating and sharing event photo frames easy, ensuring everyone gets a personalized keepsake for social media.
In this guide, we’ll walk you through the step-by-step process of making an event photo frame and sharing it effortlessly on social media.
Take a tour, how frameMe works: Arcade link
Step 1: Plan Your Event Theme and Frame Design
Before creating a photo frame, it’s essential to align it with the event’s theme and branding. Ask yourself:
- What is the event type? (Wedding, concert, business conference, etc.)
- What colors, fonts, or logos represent the event?
- Should it include sponsors’ branding or event hashtags?
- What size should the frame be? (Square, portrait, or landscape?)
Once you have a clear vision, you can move on to designing the frame.
Step 2: Design the Photo Frame
You can create a photo frame using tools like:
- Canva – A user-friendly tool with pre-designed templates.
- Adobe Photoshop – Best for advanced editing and customization.
- Fotor – A quick and easy online editor.
Key Design Elements to Consider:
- Transparent center – So attendees can insert their photos seamlessly.
- Event branding – Add event name, date, or tagline.
- Fun elements – Stickers, emojis, or themed icons to enhance engagement.
- High resolution – Ensure your frame looks professional and sharp.
Once the frame is ready, save it in PNG format with a transparent background.
Step 3: Upload Your Frame to FrameMe.org
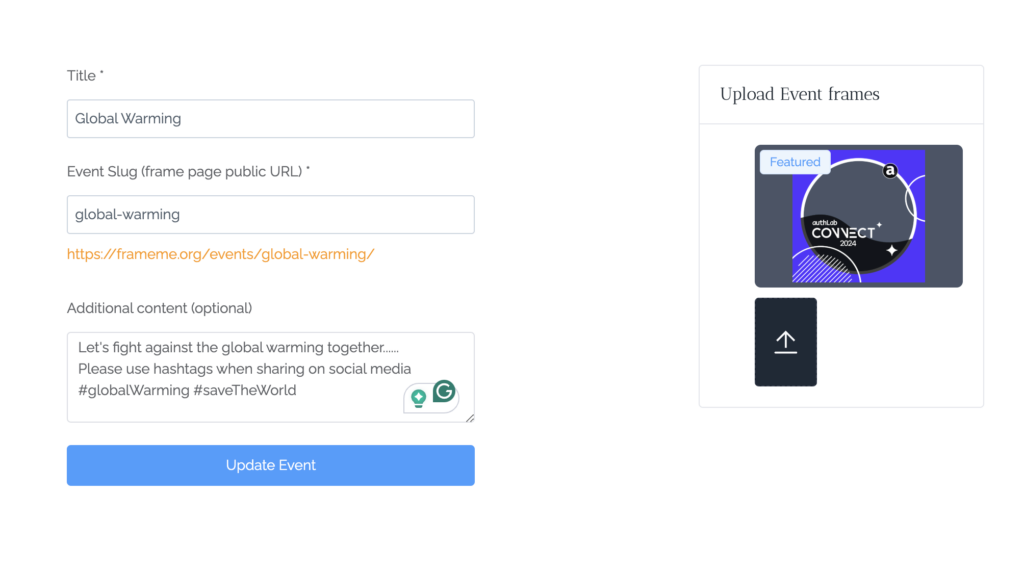
FrameMe.org simplifies the process of sharing photo frames for any event. Here’s how you can upload and share your custom frame:
- Sign in to FrameMe.org (or create an account if you don’t have one).
- Click on “Upload Frame” and select your designed PNG frame.
- Set event details like name, date, and any hashtags.
- Generate a shareable link for event attendees.
- Preview and test to ensure the frame fits well.
Once uploaded, your attendees can start using the frame instantly!
Step 4: Encourage Attendees to Use the Frame
After uploading your frame, it’s time to spread the word! Here’s how you can maximize engagement:
- QR Code Signage – Display a QR code at the venue so attendees can scan and access the frame instantly.
- Social Media Announcements – Post about it on Instagram, Facebook, and Twitter with a step-by-step guide.
- Live Demonstration – Show attendees how to upload their photos using the frame.
- Photo Booth Integration – If you have a photo booth, integrate the frame directly for an automated experience.
Step 5: Share on Social Media
Once attendees create their framed photos, encourage them to share them on social media! Here’s how to amplify the reach:
- Use a dedicated event hashtag to track and showcase photos.
- Create a contest where the best-framed photo wins a prize.
- Reshare user-generated content on event pages.
- Tag sponsors and guests for maximum engagement.
Platforms like Instagram Stories, Facebook, TikTok, and LinkedIn are perfect for showcasing event moments with custom frames.
Conclusion
Event photo frames add a fun and interactive touch to any event, making moments more memorable and shareable. With platforms like FrameMe.org, creating and sharing frames is easier than ever. Follow the steps above to design your frame, upload it, and get attendees excited about sharing their event memories online!
Ready to make your next event unforgettable? Start creating your event photo frame today!